How to create and publish a site induction
This guide explains how main contractors create a site induction for a project in Sync, add sections and questions, and publish the induction so it can be completed on site or before arrival.
- Who creates it
- Only the main contractor can create and publish a site induction.
- Where it lives
- Inside a project, under the Compliance tab.
- How it is completed
- By scanning the site QR code, or by logging in where access allows.
- Shared projects
- Customer portal and subcontractor users may complete it too, depending on access.
Before you start
Before creating a site induction, make sure the project has already been created in Sync. You should also have the following information ready:
- Project site details.
- Site working hours.
- Site rules and conduct requirements.
- PPE requirements.
- Emergency procedures.
- Any documents visitors must acknowledge.
- Any questions visitors must answer.
- Whether the induction must be completed by scanning the site QR code.
Go to Projects
From the main Sync dashboard, open the Projects section. You will see the projects available to your account.
Use the search, filters or table view to find the project you want to create the induction for.
Open the project
Select the project from the Projects table. This opens the project record, where you can view the project summary, details and other project areas.
Stoke-on-Trent
Staffordshire, ST1 5NX
Open the Compliance tab
Inside the project, select the Compliance tab. The Compliance area includes health and safety reports, site induction, engineers and log entries.
Select Site induction.
Create the site induction
If no site induction has been created for the project, the Site induction area will show that none exists yet.
Select Create site induction. This starts the induction builder.
Add induction sections
The induction builder lets you create the sections that visitors must read and complete. Common sections include:
- Site information.
- Site rules and conduct.
- PPE requirements.
- Emergency procedures.
- Document acknowledgement.
For each section you can edit the title, add a description and include the information shown to the visitor. Visitors complete the sections in order.
Complete the site information section
Add the key information visitors need before attending site. This may include:
- Site address.
- Site working hours.
- Access arrangements.
- Parking or delivery instructions.
- Site contact details.
- Welfare information.
Keep this section clear and practical. It should help the person understand where they are going, when they can attend and what they need to know before arriving.
Add site rules and conduct
Use this section to explain the rules that must be followed on site. This may include:
- Signing in and out.
- Following site instructions.
- Keeping work areas tidy.
- Reporting hazards or unsafe behaviour.
- Restrictions on smoking, phones or photography.
- Behaviour expectations while on site.
Keep the wording clear and direct so there is no confusion around expected conduct.
Add PPE requirements
Use this section to explain the PPE required on site. This may include:
- Safety boots.
- Hi-vis clothing.
- Hard hat.
- Gloves.
- Eye protection.
- Hearing protection.
- Task-specific PPE.
Add emergency procedures
Use this section to explain what to do in an emergency. This may include:
- Fire alarm process.
- Assembly point location.
- First aid arrangements.
- Emergency contacts.
- Accident and incident reporting.
- Evacuation procedure.
This section should be simple, easy to understand and specific to the project.
Add document acknowledgement
If visitors or project users need to confirm they have read and understood certain documents, add a document acknowledgement section. This may include:
- Site rules.
- RAMS.
- Health and safety documents.
- Project-specific instructions.
- Policies or procedures.
This section can be used to capture acknowledgement before the induction is completed.
Add induction questions
After creating the sections, you can add questions to check understanding. Questions are added to the relevant section. For each question, enter the question, the question type and the correct answer.
For example, a true or false question can confirm that the person understands a site rule or document. Correct answers are never shown to visitors.
Add quiz questions visitors must answer after reading this section.
Save your draft
You can save the induction as a draft while you are building it. Use Save draft if the induction is not ready to publish.
Review the induction
Before publishing, review the induction carefully. Check that:
- Each section is complete.
- Site information is accurate.
- Working hours are correct.
- PPE requirements are clear.
- Emergency procedures are correct.
- Any acknowledgement wording is included.
- Questions and correct answers have been added.
- The induction is suitable for the project.
This review matters because the published induction may be used by visitors, subcontractors, engineers and shared project users.
Configure publish settings
Before publishing, complete the publish settings. This includes:
- Revision date, to identify the version of the induction.
- Estimated completion time in minutes, so users know how long it takes.
- QR scan requirements, if the induction must be started from the QR code.
Decide whether a QR scan is required on site
Sync lets you require completion through a public QR link. If this setting is enabled, users must start the induction by scanning the QR code, and portal or project-tab starts are blocked.
Use this option where you want to make sure the induction is started from the QR code process rather than directly from the portal. If it is not enabled, users may complete the induction through the relevant project area, depending on their access.
Publish the induction
Once the induction has been reviewed and the publish settings are complete, select Save and publish. The induction will then be available for completion.
How people complete the induction
A published site induction can be completed in different ways, depending on the project settings and each person's access.
Visitors and site attendees scan the project or site QR code and complete the induction through the public flow, before or on arrival.
Users with access log in, open the project and complete the induction through the project area, where permitted.
Where a project is shared, customer portal and subcontractor users may complete it through the project, keeping records connected.
What people see on the mobile app
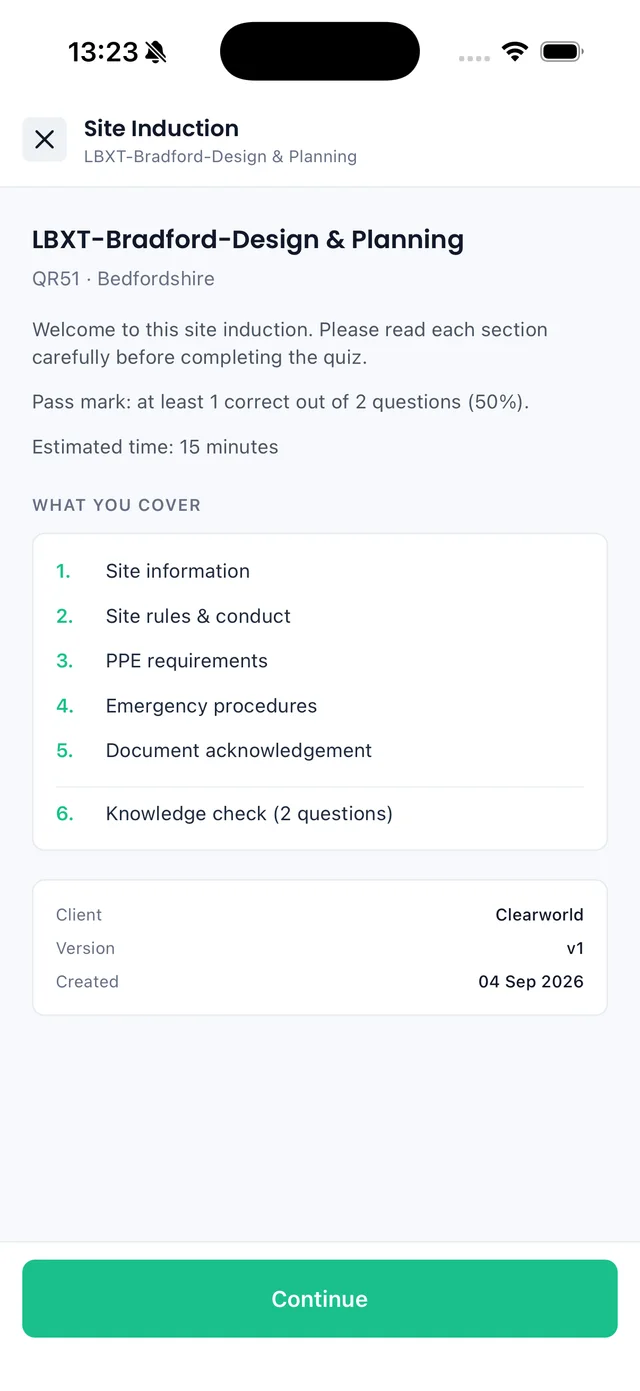
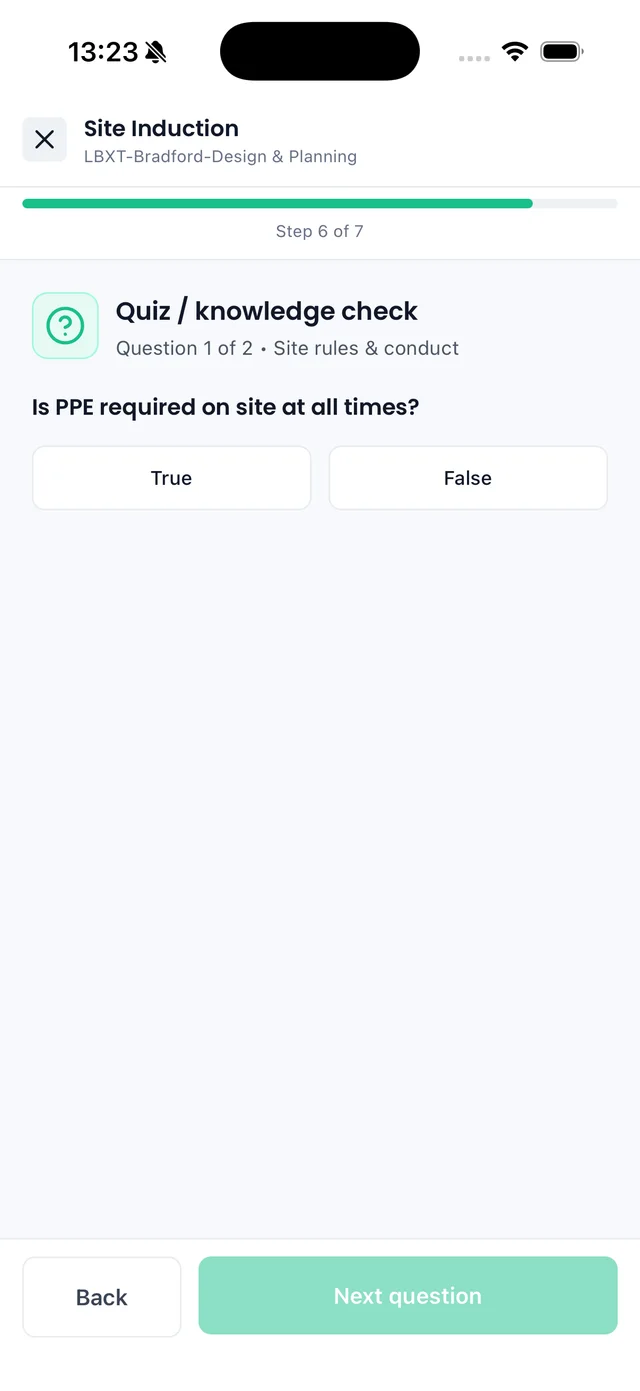
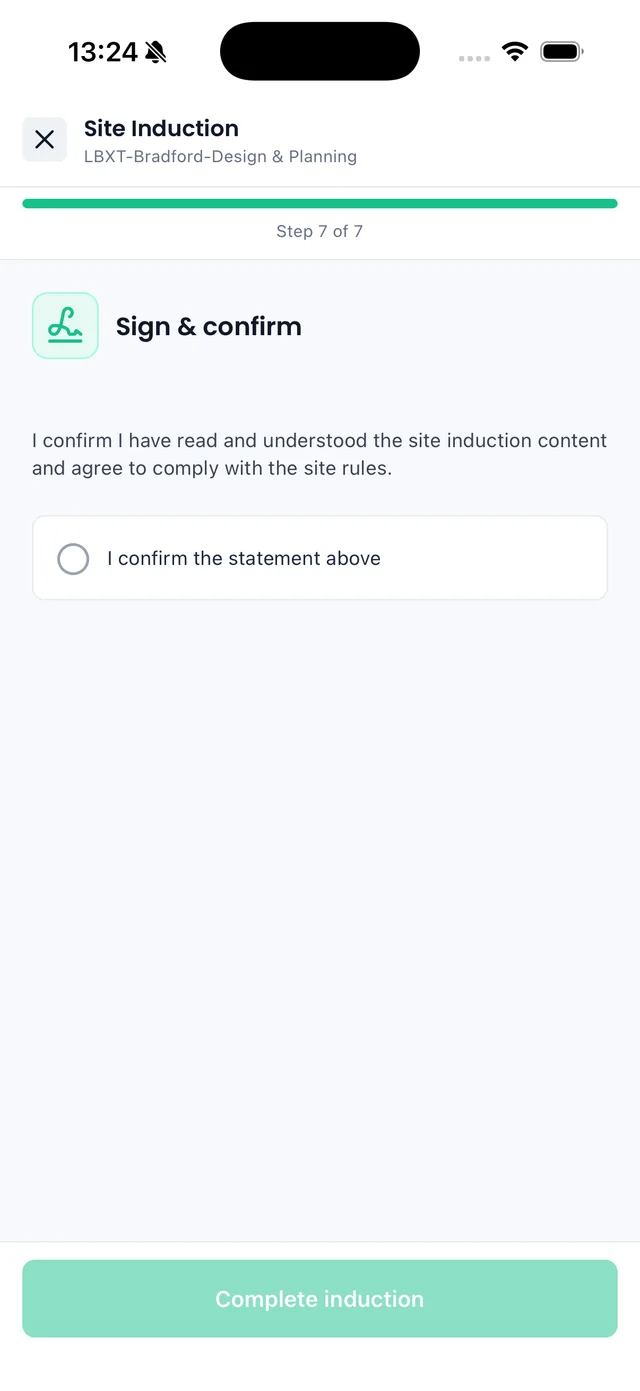
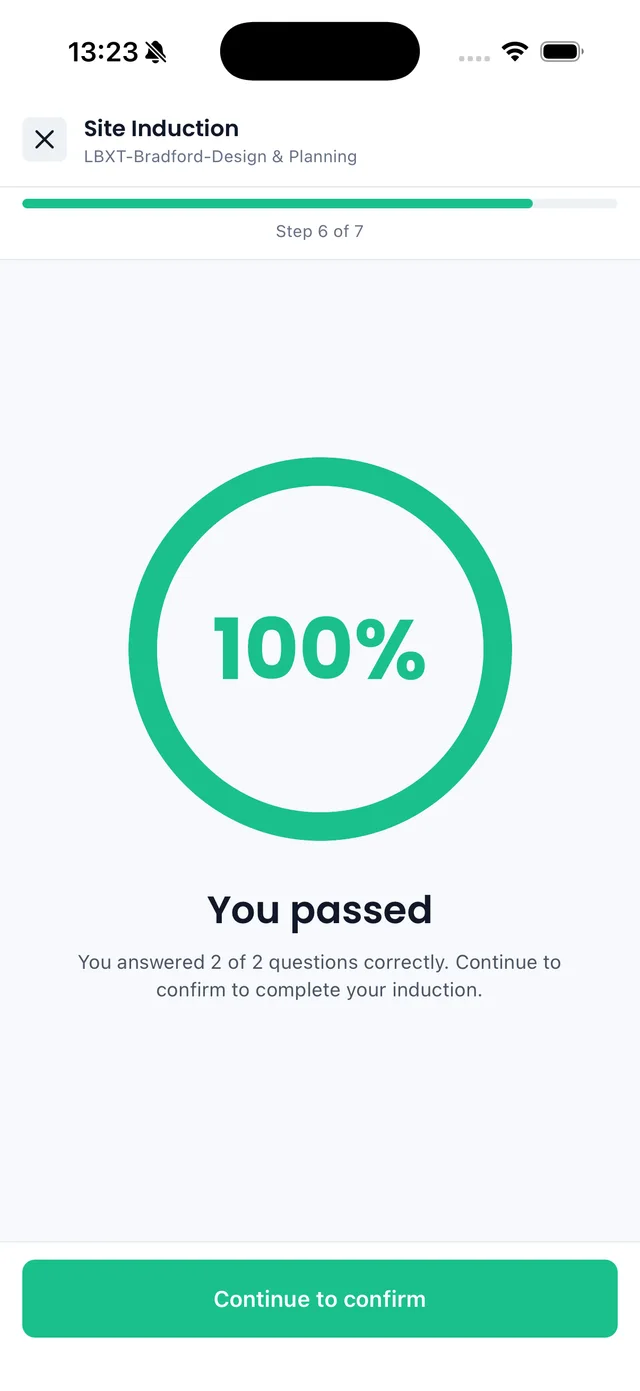
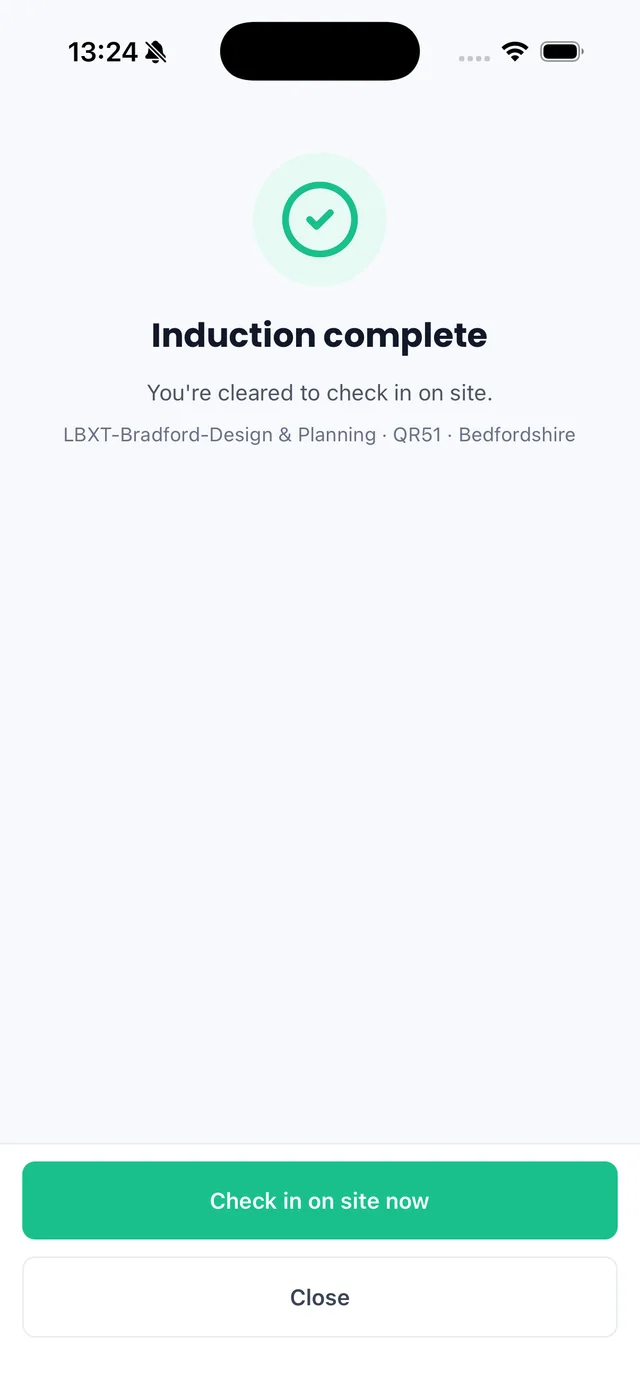
Once published, the induction can be completed on the Sync mobile app. People open it, read each section, answer the knowledge check and sign, then check in on site as soon as they pass.
What you can monitor
Once inductions are being completed, you can review completion activity and check who has completed the required induction. This helps with:
- Site readiness.
- Compliance visibility.
- Audit records.
- Health and safety oversight.
- Reduced delays before attendance on site.
Site induction checklist
Before publishing a site induction, check the following:
- The project has been created.
- The correct project has been selected.
- The Compliance tab has been opened.
- A site induction has been created.
- Site information has been added.
- Site rules and conduct have been added.
- PPE requirements have been added.
- Emergency procedures have been added.
- Document acknowledgement has been added where needed.
- Questions have been added where needed.
- Correct answers have been selected.
- Revision date has been entered.
- Estimated completion time has been entered.
- QR scan settings have been reviewed.
- The induction has been saved and published.
Common issues
Only the main contractor can create a site induction. If you are using a customer portal or subcontractor portal, you may be able to complete an induction, but you cannot create one.
Check that the induction has been published. If it is still in draft, it will not be available for completion. Also check that you are looking at the correct project and that your account has access to it.
Check that the subcontractor has been given access to the shared project. Also check whether the induction requires completion through the QR code. If QR scan is required, they must start the induction using the public QR link.
Check that the project has been shared with the customer portal user and that the induction has been published. If QR scan is required, they may need to start through the QR code instead of the project tab.
A draft induction must be saved and published before it becomes available for completion.
Summary
To create a site induction in Sync:
- 1Go to Projects and open the relevant project.
- 2Select Compliance, then Site induction.
- 3Select Create site induction.
- 4Add the required induction sections.
- 5Add questions where needed.
- 6Save the induction as a draft while editing.
- 7Review the induction carefully.
- 8Complete the publish settings.
- 9Decide whether a QR scan is required.
- 10Save and publish the induction.
Once published, the induction can be completed by scanning the QR code or, where permitted, through the relevant project section. For shared projects, customer portal and subcontractor users may also complete it, depending on their access and the induction settings.